Mock-Up Request Guide
Please read the following instructions carefully before filling out the form. This guide will help you complete each section accurately to avoid delays or miscommunication during the mock-up process.
1. Upload Original Logo File
- What to upload: The client's official logo in high resolution.
- Accepted formats: .pdf, .png, or .jpg
- Important notes:
- Prefer vector-based PDF files or PNG files with transparent backgrounds.
- Do not upload screenshots or low-resolution images.
- Make sure the logo is not cropped or distorted.
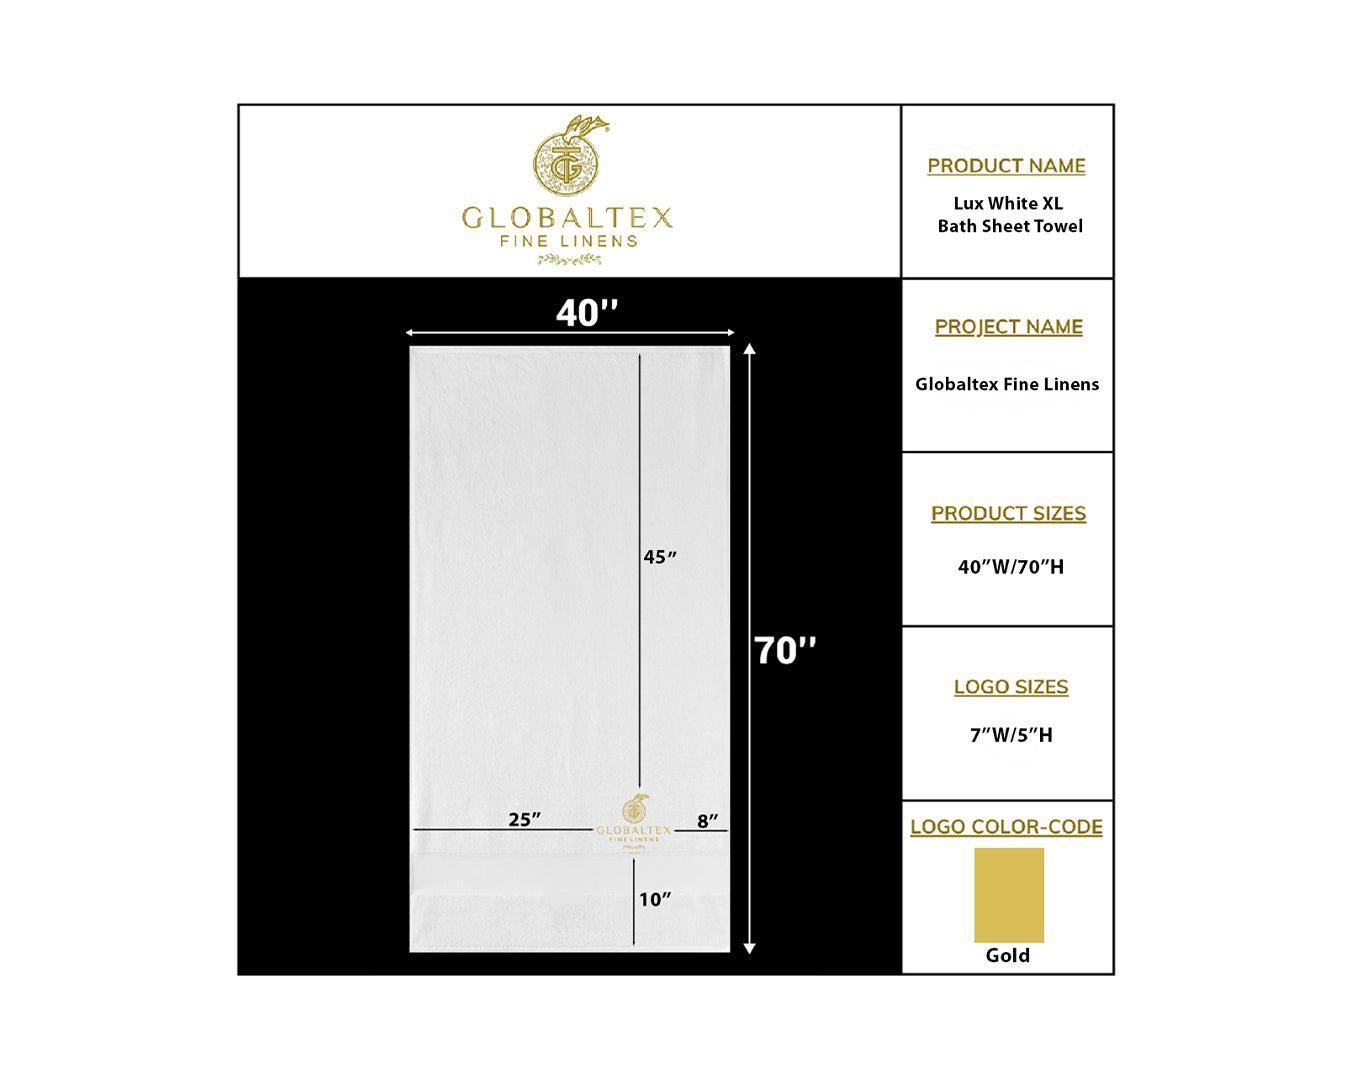
2. Logo Placement Measurements
- Why it's important: The correct positioning of the logo is essential for a realistic and production-ready mock-up.
- How to enter measurements:
- Provide the exact distance (in inches) between the logo and each edge of the product:
- Top
- Bottom
- Left
- Right
- Example input: Top: 45", Left: 25", Right: 8", Bottom: 10"
- Tips:
- If the logo needs to be centered, you can write “Center horizontally” or “Center vertically.”
- If it's embroidered, note the expected embroidery size.
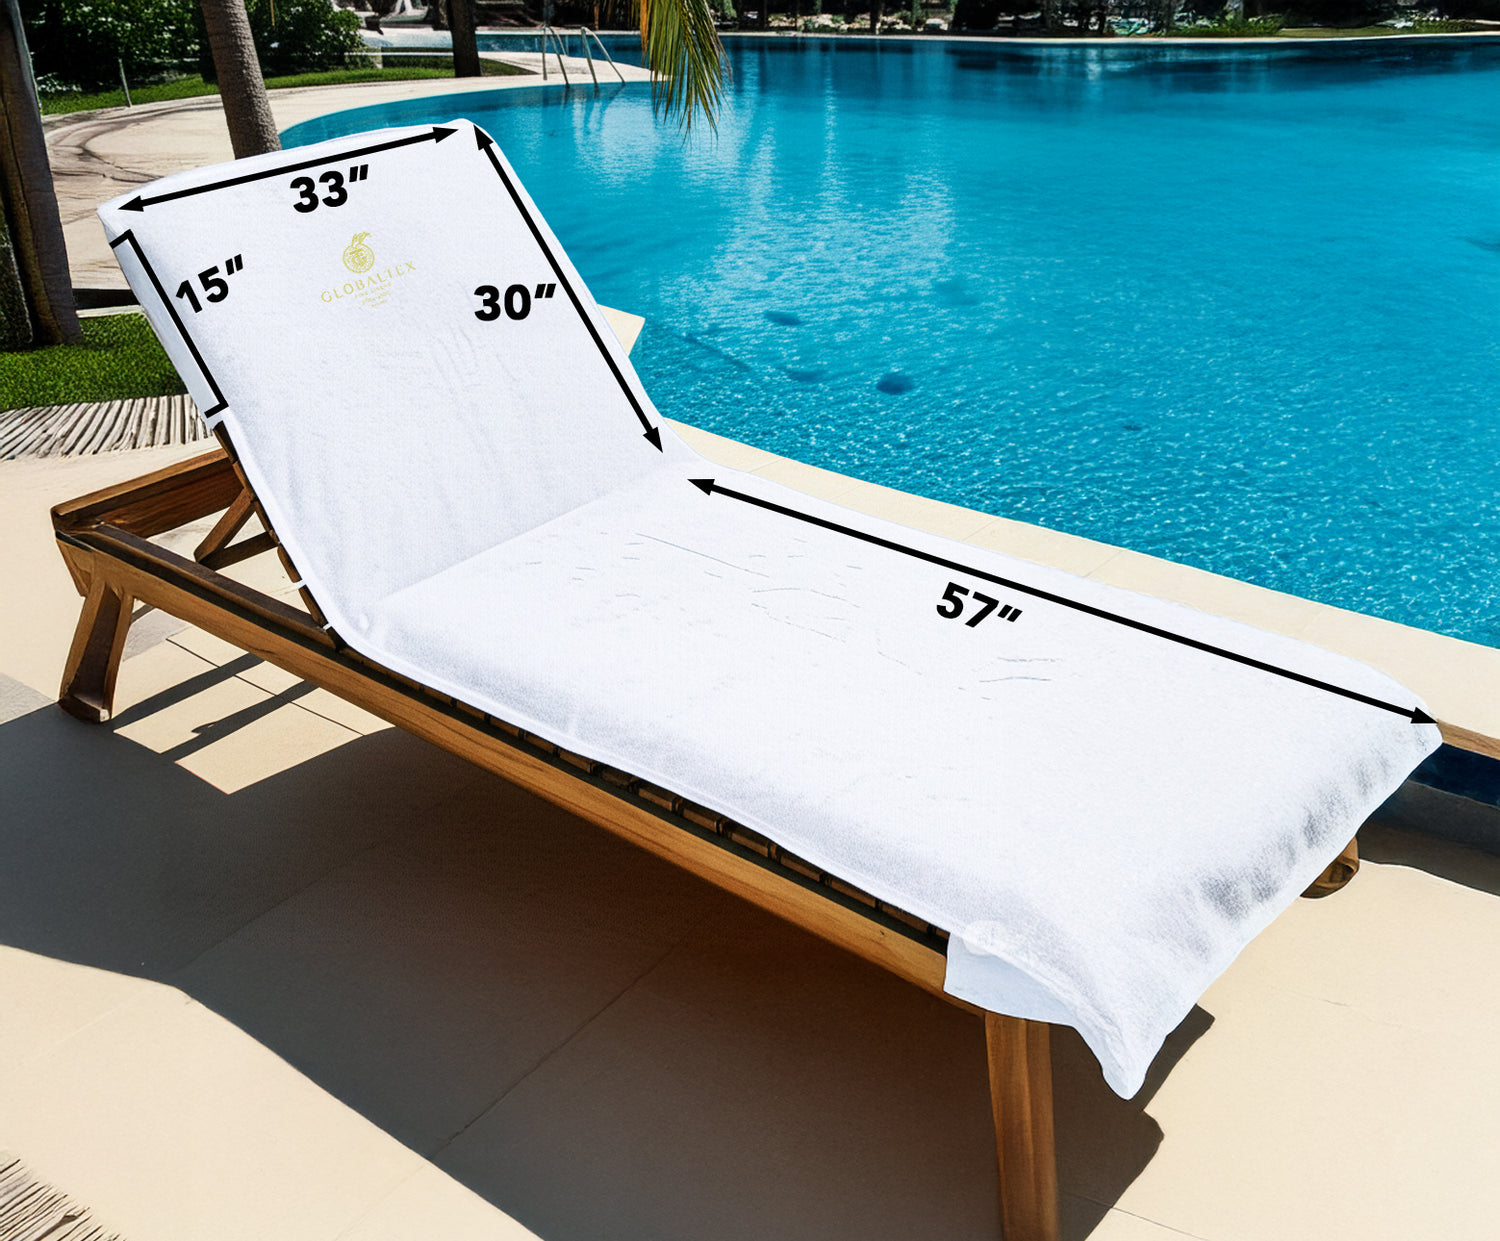
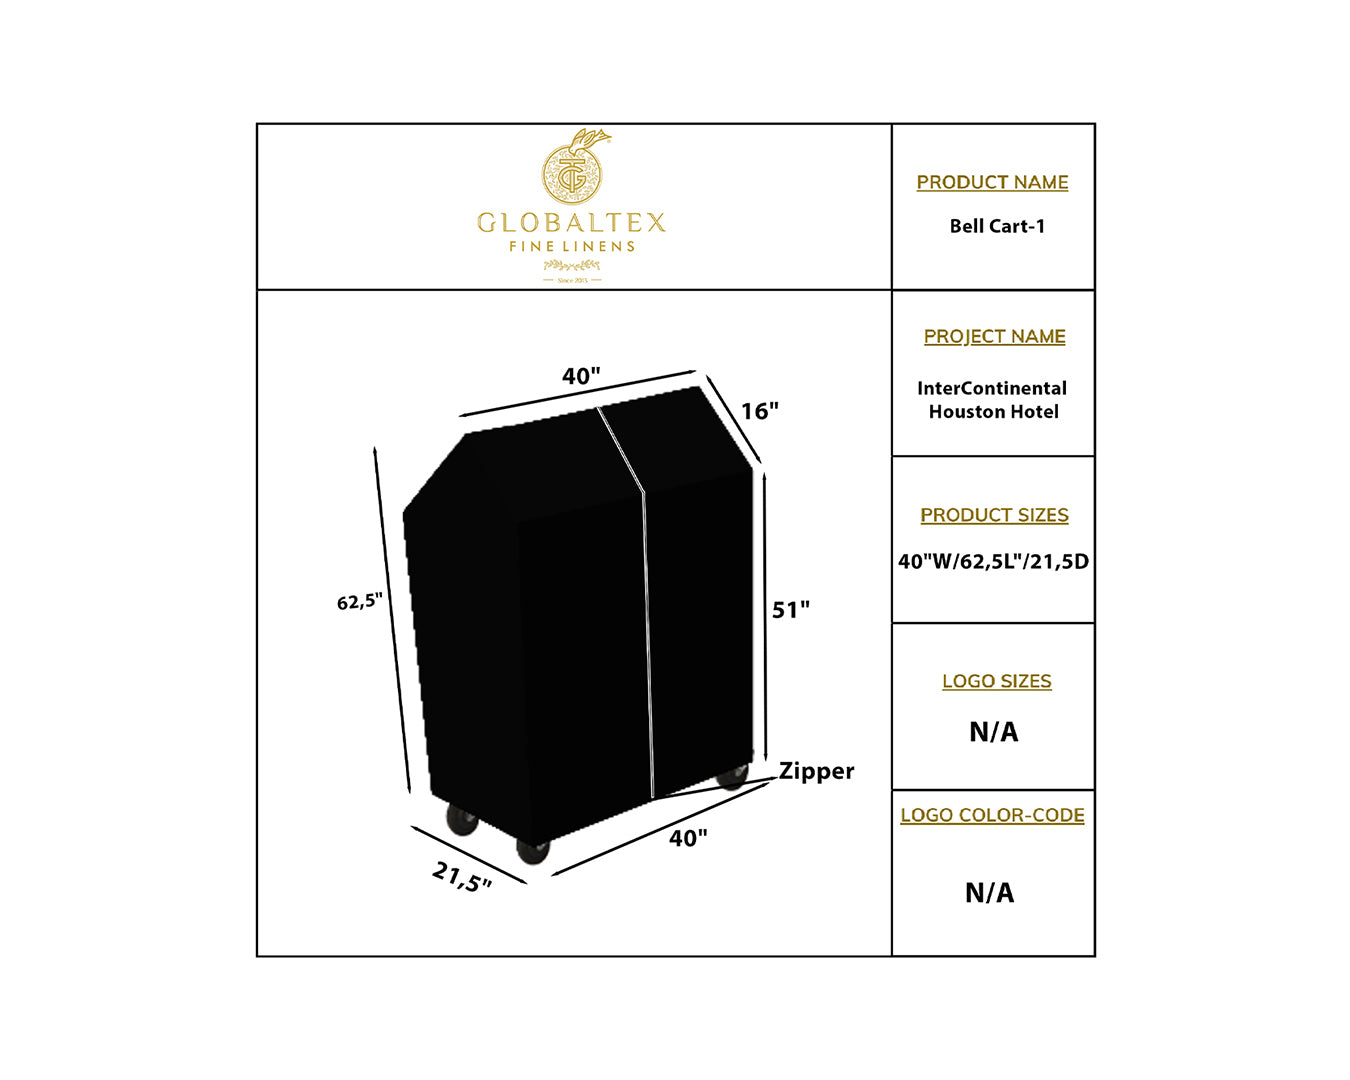
3. Product Dimensions
- What to include: Overall size of the product in inches (W x H x D).
- Why it matters: Dimensions help the design team create an accurate scale for the mock-up.
- Example input: Width: 53", Height: 79,5", Depth: 9"
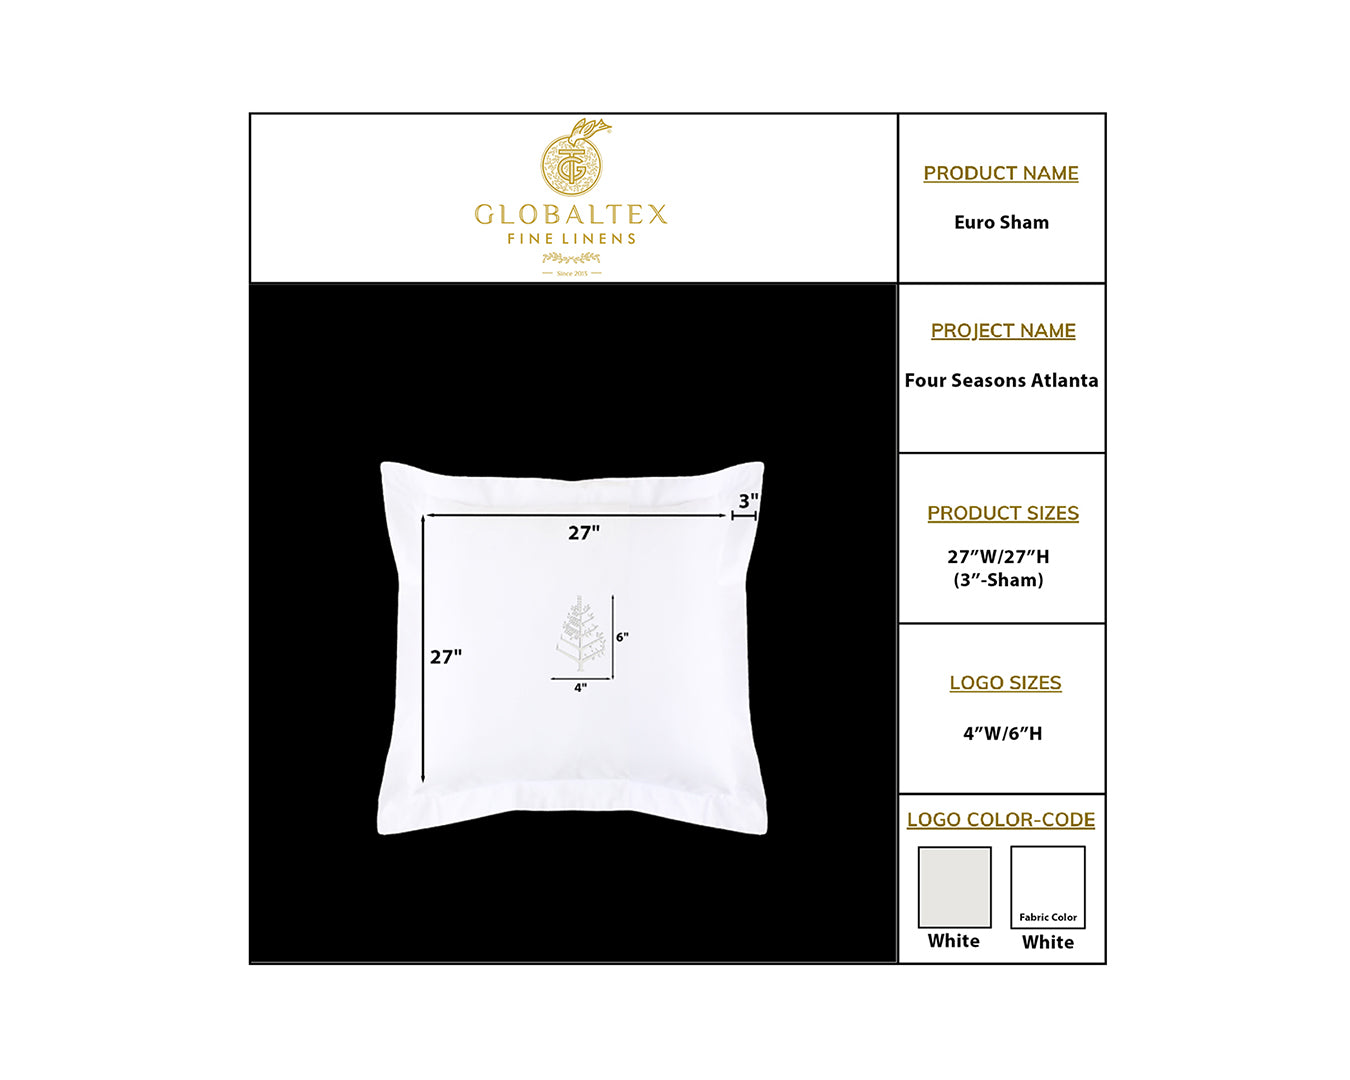
4. Additional Measurements or Components
- Purpose: To note any custom sizing or accessory specifications required for the mock-up.
- Examples:
- Pillow sham size (e.g., 20" x 26")
- Flange width (e.g., 2" on all sides)
- Header height for curtains
- Bed skirt drop length
- Tip: If the customer has specific requests or notes, include them here.
5. Notes or Special Requests
Use this field to:
- Explain unique positioning or styling requests.
- Mention product colors, orientation (landscape/portrait), or specific textile type.
- Specify if the mock-up is for embroidery, printing, or woven label application.
